Facebook Instagram Pinterest Twitter

Glamumous

  • Home
  • About
  • Contact
  • Disclosure/Privacy
  • Media


This Christmas sees many families here in the UK facing unprecedented hardship. The effects of Covid combined with rising food and duel prices means that many are struggling with the costs of the festive season and harboring concerns about putting on a decent spread for dinner on the big day. 

Marcus Rashford, the footballer famed for his campaign to tackle food poverty in the UK, has teamed with chef Tom Kerridge to create a Christmas meal plan for struggling families for just £10! 

The meal plan includes a Christmas Day feast of stuffed turkey roll, with tray-baked vegetables and greens, plus potato and carrot hash with eggs for Boxing Day lunch. The meal plan is designed for those using Healthy Start vouchers (which would cover the cost of the vegetables) though states that others would be able to recreate the dishes for just £13-14.

The entire meal plan is detailed in an instructional video on the Full Time Meals Instagram channel, which I've embedded below:

View this post on Instagram

A post shared by Full Time Meals (@fulltimemeals)

Of the meal plan, Marcus Rashford has said: 

"Christmas has a great ability to bring family together and I want as many children as possible to wake up on Christmas morning happy and without the stress of wondering where their next meal is coming from... I want families in communities like mine to look forward to creating something special in the kitchen together and making memories."

To learn more, or donate to FareShare to help feed families on a low income, visit the FareShare website.

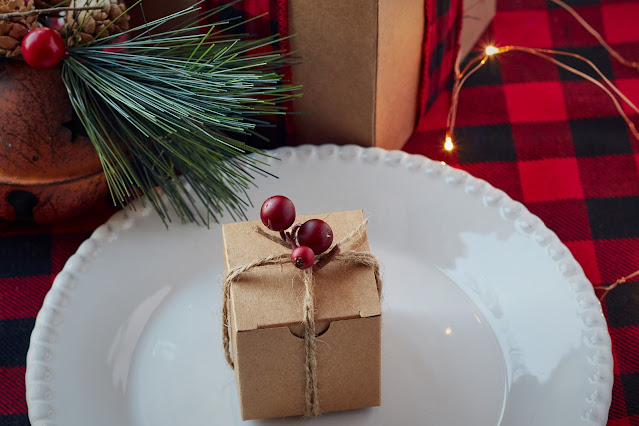
Image credit: Photo by Travel Photographer on StockSnap

Follow my blog with Bloglovin

Share
Tweet
Pin
Share
No comments


It's during the holiday season that many of us recall most fondly the traditions formed by those who have passed from our lives. My paternal nannan, Joan, would spend days baking and creating gifts for family members from her kitchen.

I remember the crumbly pastry of her tarts and mince pies, the jam roly-poly she would serve hot with custard, and how her house always smelled of sweetness and spice when she knew her grandchildren were on their way.

Most of all, when the nights draw cold, I recall the comforting taste and texture of her date and walnut loaf. Rich and moist with just a little crunch, it paired wonderfully with a small glass of her homemade Irish Cream liqueur (which as Dad still attests, was far superior to anything you can buy in a store).

A few days ago, Dad and I were reminiscing about Nannan Joan and how busy she would be in the weeks leading up to ChristmasDay. Though we were unable to find any written details of her recipes (for she knew all of the details by heart and measured by eye), I felt compelled to try and recreate a date and walnut cake in her honour.

For this recipe, I wanted to try and create the cake using a decorative bundt tin, as the finished cake is firm and heavy enough to hold the shape well. If you don't have a bundt tin to hand, you could recreate this recipe in a small loaf tin instead, being careful to check periodically after the first hour if the cake has already cooked.


Ingredients:

  • 150g of stoned, dried dates, chopped
  • 25 g unsalted butter
  • Just under 1tsp bicarbonate of soda
  • 200 ml boiling water
  • 100 g (5 oz) light muscovado sugar
  • 2 medium eggs
  • 220 g plain flour
  • 1 1/2 tsp baking powder
  • 1tsp ground mixed spice
  • 1/2 tsp cinnamon
  • pinch of salt
  • 100g of walnuts, finely chopped
  • Optional: A little icing sugar, to decorate

Method

  1. Place the dates in a bowl with the bicarbonate of soda and the butter. Pour over the boiling water and stir until all of the butter has melted (this should take only a minute or two). The water will begin to turn a rich brown colour. Set the mixture aside to cool, and to allow the dried dates to plump up.
  2. Preheat your oven to 180ºC (350ºF, Gas Mark 4).
  3. Grease a 7 inch deep bundt tin by using either cooking oil spray, or oil applied with a folded piece of kitchen roll. Be sure to get inside all of the grooves and pay particular attention to the base (which will become the "top" of the cake when finished). 
  4. In a large bowl, beat the sugar and eggs together until they are combined. Next, add the cooled date mixture and stir well.
  5. Sift in the flour, baking powder, mixed spice, cinnamon and salt, while folding the mixture gently. 
  6. Finally, add the chopped walnuts and ensure all ingredients are thoroughly combined. 
  7. Pour the mixture into your prepared tin and ensure the top is level. You're likely to need a flexible spatula to fully extract this sticky mixture from your bowl.
  8. Bake for approximately 1 hour and 15 minutes, or until the cake has risen and browned nicely on top. Be sure that a skewer inserted into the cake comes out clean. When using bundt tins, I've found that the area closes to the "inner ring" takes longer to cook than the edges, so be sure to check here even if a skewer inserted in the centre of the ring comes out clean. 
  9. When using a bundt tin, it's really important to ensure the cake has cooled sufficiently before attempting to turn it out. This is because the cake will contract slightly once cooled, allowing you to turn it out more easily. When turning it out onto a wire rack, use the back of a wooden spoon to tap the base. If needed, a slightly greased flat knife slipped around the lip of the pan should loosen it more. 
  10. Optional: use a sieve to dust the top of the cake and enhance the pattern formed by the tin.


Prep time: 20 minutes

Cook time: 1:15

Total time: 1:35

Yield: 10

Once cooled, serve in slices just under an inch thick. It's also delicious lightly toasted with a spread of butter. This cake is moist and rich, and can be frozen or kept in a sealed container for around 5 days.


I hope you enjoy this recipe as much as we did. Please feel free to tell us your own experiences in the comments section below. 
Share
Tweet
Pin
Share
3 comments


As my children and I were all labouring under the effects of persistent colds, I remembered a "recipe" for herbal steam tablets in the January edition of Daphne's Diary. Made using bicarbonate of soda and essential oils, these tablets are intended to release lovely smelling vapours to invigorate while you shower and they're very easy to make at home.

Here's how we made our own herbal steam tablets, along with a few tips we learned along the way.

Share
Tweet
Pin
Share
3 comments

Starting today, thousands of people across the world are living on the equivalent of £1 per day for five days to raise awareness of global poverty for the Live Below The Line campaign. Essentially this means buying enough food for fifteen meals with just £5. To most people, this challenge is nigh on impossible, but the experiences of those who participate shed light on what it's really like to live in poverty.

Share
Tweet
Pin
Share
No comments

Bananas are the one fruit I know my children will happily eat. They're a staple item for our weekly online shop, great both as a snack or served as a quick dessert with squirty cream and sprinkles.

Unfortunately I often buy more bananas than we can eat, or they ripen too quickly and are left in the fruit bowl with their skins growing blacker. While overripe bananas are incredibly sweet, their appearance is a great put-off - after all, children far prefer their fruits to be brightly coloured and fun!

Feeling frugal, I dug out an old recipe for banana bread yesterday to use up those unwanted fruits. It went down so well I deliberately ordered more bananas than we need for this week's shop so I can make it again at the weekend.

Here follows our fabulous frugal recipe for sweet banana bread, which tastes wonderful on it's own or can be served for dessert with a generous dollop of crème fraiche.
Share
Tweet
Pin
Share
1 comments

As your baby grows to a walking talking little person, she may well become develop fussy choices about what, when and how much she wants to eat. Rather than sit quietly in the high chair, she'll likely want to feed herself and make choices about what she will - or won't - put into her mouth.

It's essential that a child's healthy eating habits are developed early to ensure she is nutritionally fulfilled both now and in later life. Here are some helpful hints and morsels of advice to make meal-times healthy and happier for you both.
Share
Tweet
Pin
Share
1 comments
As compulsory food technology lessons have been phased out of the compulsory curriculum, more and more teenagers leave school unable to cook a simple meal.

To encourage children to learn these basic skills, Leon Restaurants have set up the Cook5 campaign to challenge school-aged children to cook five simple savoury meals and share their experiences on the website.

Share
Tweet
Pin
Share
No comments

Through these Easter holidays the weather has been as lousy as our finances: many rainy days, the temperature too cold to play out, and not enough spare cash to fund excursions to brighten the mood.

Then Princess had a wonderful idea: "We could have a tea party" she said. Since I always keep a stock of baking supplies in the cupboard, I realised it would be a wonderful idea. We spent the morning baking treats and enjoyed a wonderful afternoon having a picnic-style tea party spread across a blanket on the floor in our lounge.

In this post I'll share three recipes for delicious treats which we made for our tea party, all of which were so cheap to make with more than enough left (even after guests) to enjoy for the rest of the week.

Share
Tweet
Pin
Share
No comments

Many of us feel the need to cut down on our daily living costs in order to make ends meet. Cutting down on the amount we spend on food is one of the first ways we reduce our spending, though often we find that cheaper foods are less appetising or nutritious than the (more expensive) choices we may prefer to buy.

For much of my adult life I have found myself having to budget well in order to make ends meet. Making sure I can prepare and cook meals within my budget has always been top priority, and I'm proud of the fact that my children have always been well-fed and enjoyed their food, no matter how little money I may have in my purse.

In this post I'd like to share some of the tips and tricks I've learnt over the years to make cheap food more appetising to help you prepare meals for your own family which look and taste great, no matter how little you have spent in making them!

Share
Tweet
Pin
Share
No comments

Often we find that the most interesting and satisfying projects are free! Re-growing vegetables from shop-bought producer is one such project which is not only fun, but a frugal investment to the kitchen garden!

It takes far less time for the vegetables to be ready for harvesting than when growing plants from seed! Kids will love watching the plants quickly develop to maturity, while you can enjoy the satisfaction of saving on grocery shopping by harvesting vegetables grown naturally at home.

Here are three ways you and your family can grow vegetables from the leftovers of shop-bought produce which you can start at any time of year and in many cases grow on the windowsill if the climate is too cold. I've also added links to more projects found across the web - just in case you and your family develop green fingers after trying these ridiculously simple and gratifying ideas!

Share
Tweet
Pin
Share
No comments
pancakes with chocolate sauce and mint


This year, Shrove Tuesday falls on the 12th of February, and no doubt your family will be hoping for a plate of pancakes to celebrate the occasion!

Rather than offer pancakes made from a packet (or those awful ready-made things wrapped in plastic), why not treat your family to a batch of delicious home-made ones instead? They really don't take much time or effort to make, and - unless you insist on flipping a pancake only to find it gets stuck on the ceiling - are virtually foolproof too.

Here is my recipe for classic, homemade pancakes to which you can add whatever fillings your family enjoy best.
Share
Tweet
Pin
Share
No comments
The first time I tasted chocolate fudge brownie was last year, when I bought one on a whim as part of a meal deal at Boots. I didn't even eat it right away, instead saving it in the fridge to have as an evening snack. To be honest, I didn't think I'd enjoy it any more than a piece of chocolate cake...

After tasting my first mouthful, I was hooked. How could I not have tried this delectable dessert before? It was like eating the most delicious chocolate with the texture of dense, rich cake. More satisfying than a bar of Galaxy, and perfect with a cup of strong white coffee. And apparently, home-made chocolate brownie tasted even better!

So began my quest for the ultimate chocolate brownie recipe, and after several variations I've finally settled on the one I consider to be the best!
Share
Tweet
Pin
Share
No comments
I originally wrote this post and eBook back in 2009. Since then our food bills have become even more expensive, but the advice offered remains as useful. 

So I've decided to re-publish this post and (hopefully) rekindle a little interest for Glamumous readers who may find it useful in 2013.

As I'm sure we're all aware, the cost of our family food bills has skyrocketed these past few months! According to the price comparison site, MySupermarket, the average weekly spend for a family of four has increased by as much as 25%.
Shocking, isn't it?

While we have little control over the rising cost of fuel, housing and other household bills, we can control just how much of our hard-earned cash we part with to feed the family. Switching over to supermarket own brands is not the only solution: there are many more ways we can choose to save money yet feed our families healthy and satisfying meals.

I've always considered myself a frugal mum. Compared to my friends and family, our food shopping bills are positively miniscule, and yet we always have food on the table, in the cupboards, stored in the freezer... In short, we are never hungry and I often feel smug in my knowledge of thrifty ways which are helping us survive this credit crunch.

So in response to encouragement from my friends (and all the articles in magazines which seem to teach us nothing new about saving on food bills), I decided to write my own ebook: Fabulous Frugal Food Bills.

This ebook offers useful tips, tricks and a scattering of family-friendly recipes to help you save money on your family food bills. From learning how to organize your food stores for maximum efficiency to saving money at the supermarket and even growing your own, I hope you will find something useful to lessen the burden of your weekly shopping trips.

Share
Tweet
Pin
Share
No comments
When I first saw those TV adverts suggesting we could feed a family of four for £50, I naturally assumed this meant a week's worth of evening meals only. So it did come as a pleasant surprise to find this cost includes breakfasts and lunches too. For a whole week!


Sainsburys have developed an efficient, cost-effective meal plan and recipe guide to cover a week's worth of meals for the whole family to enjoy together. The plan does require sticking to portion sizes and does not include any snacks between meals, though undoubtedly it is a cost effective means of feeding the family on a budget.

Share
Tweet
Pin
Share
1 comments
Lately my kids have developed a taste for muffins. The chocolate chip variety to be exact. Since these seem to cost so much in the supermarkets (around £1 for four, which I personally think is extortionate) I decided to work out a tasty recipe for us to make together at home.

As the title suggests, this recipe is foolproof! Each and every time I've attempted this recipe, the kids devour the muffins faster than I can say "wait for them to cool". Which, when you consider how fussy my son can be, is a rather great achievement!

This recipe should provide enough batter to make 12 muffins if using the larger muffin cases, or 18 small ones if you only have cupcake cases to hand, and costs around £1.20 for everything (working out between 7p and 10 each muffin, depending on the size).
Here's what you will need:
  • 250g Plain Flour
  • 100g caster sugar
  • 2 teaspoons baking powder
  • A pinch of salt
  • 1 medium egg, beaten
  • 200ml milk
  • 80ml vegetable oil
  • 100g pack of chocolate chips (or two bags of chocolate buttons, crushed)
  • [Optional] a tablespoon of brown sugar
Here's how to make your foolproof chocolate chip muffins:
  1. Preheat your oven to 200 degrees Celsius (gas mark 6)
  2. Mix all of the dry ingredients together in a large bowl
  3. Beat all of the wet ingredients together in a jug, then pour over the dry products in the bowl. Mix well until everything is combined.
  4. Divide your mixture between your muffin/bun cases, making sure each case is about 3/4 full.
  5. For extra special muffins, sprinkle a little brown sugar over each filled case (optional, leave out of you're worried about the sugar content!).
  6. Bake in your preheated oven for about 20 minutes, or until brown and risen. To be sure your muffins are cooked, stick a toothpick in one muffin and see if it comes out clean.
  7. Remove from the oven and leave to cool on a wire rack. Then try to hide the muffins or they may well disappear before you have time to try them yourself!
You could make some variations to this recipe, such as:
  • Reducing the milk to 180ml and adding a chopped banana
  • Using plain wholemeal flour instead of white
  • Use brown sugar instead of white
  • Try berries instead of chocolate chips
I love making these muffins, especially as these are so cheap to make! I've found these can store for up to a week when in a sealed container, and they also freeze well, so if you're short of time double up on ingredients, use an extra muffin tray and make some in advance.

Hope you enjoy these as much as we do!

Image credit: wentongg, via Flickr Creative Commons.
Share
Tweet
Pin
Share
1 comments
If you're looking for a helpful way to encourage your kids to learn to cook, here it is: the Real Meals cookbook which was recently published by our government in an initiative to teach 11 year olds the basics of healthy cookery.

Available for all Year 7 students through their school, this booklet offers 32 healthy and delicious recipes with easy instructions which is designed especially with young teenagers in mind. The Real Meals recipes were chosen after the public was asked to nominate the basic dishes every child should learn how to cook. What's more, the booklet has been endorsed by the celebrity chef Phil Vickery:
Cooking is a skill and often it is not learned at an early enough age. Once you can cook the basics you will have the best survival tool in the box to take you into adult life. Eating good quality meals made from basic ingredients should be part of everyone’s daily experience and by learning how to prepare simple and nutritious meals we will make this a reality (Source).
 
What I love most about this booklet is that the recipes are simple, easy to follow and based on frugally priced ingredients! Besides offering this to your children, you may well be inclined to cook a few of these yourself!

You can purchase a hard copy of the Real Meals booklet for £7.99 by calling 0845 60 222 60 (as it's only available for free distribution through schools). However, you can read/download each individual recipe online through the Teachernet website, or download a full PDF copy from the Direct.gov website using the link below:

Download the Real Meals Cookbook (PDF)

I hope you enjoy reading through these recipes as much as I did!
Share
Tweet
Pin
Share
No comments

Tunisian fricassee is a "fast-food" style snack that is often sold in the streets. It could be described as a fried sandwich (so unfortunately, these should really only be served as a special treat), but I almost died of culinary delight the first time I was given one! However, it isn't an easy dish to make, and does require some patience as you wait for the dough to rise. I'm sure you'll love them as much as I do once you try one.

Here's what you'll need:

  • Plain flour (about 200g)
  • Dried yeast (the type you'd use to make bread)
  • A spoonful of sugar (to help the yeast make the dough rise)
  • Cold water
  • Tin of tuna
  • Two medium potatoes, peeled and chopped into small cubes
  • Red and/or green peppers
  • Mayonnaise and/or chili paste
  • Sunflower oil for deep frying
  • A couple of hard boiled eggs
  • Black pitted olives
  • Salt and pepper

Here's what to do:
  1. Firstly you need to prepare dough in the same way as you would if you were making bread. The method may differ depending on the type of yeast you are using, so if in doubt, refer to the bread making instructions found on the packet of yeast! Here's what I do (and please bear in mind that I don't use a measuring jug or scales: I've gotten good at making fricassee now!). In a large mixing bowl, I put 14 heaped dessert spoons of plain flour. In a small bowl, I mix 1 tbsp of dried yeast granules, 1 tbsp of granulated sugar and a little water then leave until it froths. This mixture is then added to the flour with a little salt and mixed thoroughly, adding more water as necessary until it forms a thick dough which comes away from the sides of the bowl.
  2. Leave the dough to rise for at least an hour until it has doubled in size. I put mine in a warn place, covered with a tea-towel and a saucepan lid to help the process along.
  3. While you're waiting for the dough, peel the potatoes and chop into very small cubes (about 1-2 cm) and boil in slightly salted water until cooked (IE: they slide off a fork when you try to skewer them).
  4. De-seed the pepper(s) and chop finely into very small cubes. Do the same with half a cucumber if you like this in salads too.
  5. Heat your oil to a very high temperature. I use a chip-frying pan for this as it seems the safest option. To check if the oil is hot enough, drop a cube of bread into the oil: it should become a crisp crouton in no less than 4 seconds!
  6. Hopefully by now your dough will have risen to twice its size. You'll need to knead it thoroughly again and ensure it is of a good consistency (it should bounce back into shape if you push your finger in).
  7. Sprinkle some flour on your work surface, and pull out a handful of the dough. Roll into a ball shape, and then squish into a flat oblong shape about 1/2 to 1cm thick. Gently place this into the hot oil and watch it rise into the shape of a small rugby ball. It will rise to the surface of the oil, so when the submerged side browns, flip it over to brown the other side (this usually takes a couple of minutes), then scoop out with a slotted spoon and place in a bowl lined with absorbent kitchen towels to blot excess oil.
  8. This first fricassee will most likely be the worst of the batch, so only fry one alone at first. When this is cooked, you could try 2/3 at a time, being careful to watch they don't burn!
  9. Once you've used all of your dough (the mixture should make around 12), leave them to cool a little while you get your fillings together. Then slice them open at one side.
  10. Fricassee fillings greatly depend on your tastes: in Tunisia, they are "buttered" with Harissa (a very hot regional chili paste) and filled with tuna, cooked potatoes and salad. I prefer to forgo the harissa and use mayonnaise instead, along with potatoes, tuna, peppers and cucumber.
  11. Top with slices of hard boiled eggs and black olives, sit back and enjoy!

Whilst Tunisian fricassee are best eaten warm, they are still rather tasty when cooled and are great for lunchboxes and picnics (though they only really keep for a day in the fridge before going soggy). Experiment with different fillings, such as cooked chicken, traditional salads and eggs to discover new tastes and styles. Any way I'm sure you'll enjoy them!

More Tasty Tuesday recipes:

  • Tunisian Tagine
  • Easy Peasy Tunisian Salad
  • Tasty Tuesdays overview

Technorati Tags: tunisian | recipes | fricassee | fried+sandwich | tuna | harissa | cuisine | food | tasty

Share
Tweet
Pin
Share
No comments


Tunisian style salad is really easy to prepare and makes a tasty side-dish for any meal. It's usually eaten with a spoon (as the vegetables are finely chopped for this dish), but can also be eaten with bread: a traditional Tunisian method of eating!


Here's what you'll need:

  • Half a cucumber

  • About 2 mewdium (or one large) tomatoes

  • Small red onion

  • Capsicum peppers (1/2 each red and green)

  • Olive oil

  • Lemon juice

To decorate:

  • Black olives

  • Boiled eggs

  • Fresh parsley

  • A few lettuce leaves

Here's how to make your Tunisian style salad:

  1. Get yourself a large mixing bowl.

  2. Finely chop the onion and add to the dish.

  3. To finely chop the cucumber, here's a little trick: get a sharp knife and make slices about 1/2 a centimetre wide across the pale flesh of the halved cucumber (towards the base). Make sure you don't cut theough: you want these slices to stay on for the time being! Turn the cucumber round 90 degrees and do the same again, like a cross hatch design. Then cut through the green skin as though you are making slices: the small chunks should come off perfectly! Once you've chopped all of the cucumber, add this to the bowl.

  4. To chop the tomatoes, cut into quarters and remove the flesh (set to one side). Then chop the more solid parts as fine as you did the cucumber. Add this and the squishy parts to the bowl.

  5. Finely chop the peppers; add these too.

  6. Add a sprinkle of salt and pepper, a drizzle of olive oil and about 2 tablespoons of lemon juice to the bowl. Mix well and taste. Add more seasoning/olive oil/lemon juice to suit your taste.

  7. Serve in a large salad bowl on a bed of lettuce leaves. Add black olives, slices of hard boiled eggs and sprinkle with a handful of chopped fresh parsley.

  8. Enjoy!

I hope you enjoy this easy recipe, which is something we enjoy regularly at home. More Tunisian recipe ideas next week!


See also:

  • Tasty Tuesday: Tunisian Tagine

Technorati Tags: tunisian recipes salad cucumber red+onion green+perrers tomatoes tasty

Share
Tweet
Pin
Share
No comments

Exactly one year ago, we moved to this "new house" and were blessed with a front door on the ground floor, lovely neighbours and most of all, a huge garden space for the kids!

For over ten years, we'd been living in a first floor flat. Sure it was roomy and in a nice part of town, but with the kids it was hardly desirable. Especially when Hubby dearest and I married and my step-children began to stay each weekend. When little Angel came along, it was almost unbearable. There was nowhere safe for the children to play; no green space to admire, and certainly no area to sit out in the sun in the summertime.

I'm so glad to be here!

Last summer was something of a frenzy and we barely had time to relax and enjoy our new home. Between decorating, clearing the jungle in the back garden and our two-month trip to Tunisia, there was barely any time to cultivate a garden. This year, we've had more time to enjoy the outdoor space: we had the garden turfed, created a space for plants and installed a fence to keep prying eyes away from our precious ones. We even bought a sand pit and playhouse for the kids. And for the first time in my life I've been able to grow things from seeds. I feel so proud of what we've achieved!

What I love most is the change I've seen in the children: they all seem so much happier, even on rainy days like today. And they're developing a wonderful interest in plants and the environment; especially my little man, who today insisted we go to the garden centre so he could buy a plant with his pocket money!

I thought he would have chosen a Venus fly trap, which he could feed with the ever increasing number of huge spiders that plague our lounge. Luckily, the garden centre didn't have any in stock. I say "lucky" because I can't stand that he picks them up and lets them run all over him! It's not that I'm scared of spiders: I just have a strange fear of them crawling on my feet...

Anyway, he settles on a seedling cucumber plant, and little Angel insisted she got in on the action by nursing a cherry tomato plant back to the car. It was so sweet watching them water their little seedlings, and give them pride of place on the kitchen windowsill "because mummy, it's too wet for them to be outside just now!"

In this last year, I've seen my little seedlings blossom and flourish. I love to watch them grow...

Technorati Tags: green+fingers | garden | gardening | house | moving | new+home | kids | seedlings

Share
Tweet
Pin
Share
No comments


So, here's my first recipe of the "Tasty Tuesdays" series: Tunisian tagine with tuna, parsley and cheese. This is a really simple dish which you could use as a starter or accompaniment to a main meal. It's also nice for the kids to snack on!

Here's what you'll need:

  • Six medium eggs
  • A small can of tuna chunks, drained
  • A handful of fresh parsley, chopped
  • Grated mild cheese (enough to fill a small teacup)
  • A medium sized potato, peeled and cut into small squares (about 1.5 cm wide)
  • One small onion, finely chopped
  • A drop of milk
  • Oil for greasing
  • Salt and pepper to taste
  • Small ceramic/earthenware roasting tray (or a casserole dish, if you don't have the roasting dish).
  • (Optional): a lemon to garnish

Here's how to make it:

  1. Heat your oven to a high temperature (about 220 degrees centigrade)
  2. Boil the potato in salted water for a few minutes until they're almost cooked. Drain and cool.
  3. Break the eggs into a large mixing bowl and beat together. Add the drained tuna, cooled potatoes, parsley, cheese, chopped onion, a drop of milk (to make sure the mixture isn't too thick!) and seasonings to suit your taste.
  4. Grease the roasting dish with the oil, then pour in the mixture ensuring everything is evenly spaced.
  5. When the oven gets hot (it really does need to be hot for the tagine to rise!), put the roaster/dish into the oven on the top shelf. Cook for around 20-25 minutes until the eggs are set and the top is slightly golden.
  6. Remove from the oven, cut into squares and serve with slices of lemon. Yum!

You can change some of the ingredients to suit your tastes. For example, you could replace the tuna with cooked chicken; use spring onions, or replace the meat with small pieces of char grilled red and green peppers for a vegetarian treat!

Hope you enjoy this recipe! More from Tunisia next week...

Technorati Tags: tunisian recipes tagine meal+ideas kids+food

Share
Tweet
Pin
Share
No comments
Older Posts

Popular Posts

  • 101 Household Tips for Every Room in your Home
  • 65 Genius Gift Ideas to Make at Home
  • All Mothers are Slightly Insane
  • How to Celebrate World Book Day
  • The Great Big List of Pregnancy Freebies

Follow Us

  • Facebook
  • Instagram
  • Pinterest

Labels

Family Housekeeping Well Being Community Food and Recipes Book Reviews

recent posts

Get new posts by email:

Archives

  • ▼  2022 (1)
    • ▼  January (1)
      • Welcome 2022!
  • ►  2021 (7)
    • ►  December (6)
    • ►  November (1)
  • ►  2020 (1)
    • ►  October (1)
  • ►  2019 (8)
    • ►  March (4)
    • ►  February (3)
    • ►  January (1)
  • ►  2018 (4)
    • ►  December (4)
  • ►  2014 (15)
    • ►  April (1)
    • ►  March (3)
    • ►  February (6)
    • ►  January (5)
  • ►  2013 (80)
    • ►  December (8)
    • ►  May (10)
    • ►  April (14)
    • ►  March (18)
    • ►  February (15)
    • ►  January (15)
  • ►  2012 (9)
    • ►  December (3)
    • ►  October (3)
    • ►  August (2)
    • ►  January (1)
  • ►  2011 (31)
    • ►  December (1)
    • ►  November (1)
    • ►  June (1)
    • ►  May (10)
    • ►  April (16)
    • ►  March (2)
  • ►  2009 (55)
    • ►  June (10)
    • ►  May (17)
    • ►  April (13)
    • ►  March (7)
    • ►  January (8)
  • ►  2008 (2)
    • ►  September (1)
    • ►  April (1)
  • ►  2007 (116)
    • ►  December (2)
    • ►  November (16)
    • ►  October (4)
    • ►  September (7)
    • ►  August (3)
    • ►  July (20)
    • ►  June (29)
    • ►  May (28)
    • ►  April (6)
    • ►  March (1)
Facebook Twitter Instagram Pinterest Bloglovin

Created with by BeautyTemplates